How To Use SSH To Raspberry Pi Remotely: A Comprehensive Guide
SSH to Raspberry Pi remotely has become a popular method for managing and accessing Raspberry Pi devices from anywhere in the world. Whether you're a developer, hobbyist, or IT professional, understanding how to set up and use SSH can significantly enhance your remote access capabilities. This article will guide you through the process step by step, ensuring you can securely connect to your Raspberry Pi from any location.
In today's digital world, remote access is not just a convenience—it’s a necessity. Many users rely on remote connections to manage servers, troubleshoot issues, or automate tasks. The Raspberry Pi, with its versatility and affordability, has become a favorite among tech enthusiasts. By enabling SSH, you can unlock its full potential without needing physical access to the device.
This guide is designed for both beginners and advanced users who want to learn how to SSH to Raspberry Pi remotely. We'll cover everything from setting up SSH on your Raspberry Pi to troubleshooting common issues. Let's dive in!
Read also:The Remarkable Life Story Of Catherine Bolle The Mother Of Josh Brolin
Table of Contents
- Introduction to SSH and Raspberry Pi
- Benefits of Using SSH
- Setting Up SSH on Raspberry Pi
- Connecting to Raspberry Pi Remotely
- Securing Your SSH Connection
- Tools and Software for SSH
- Troubleshooting Common Issues
- Advanced SSH Techniques
- Frequently Asked Questions
- Conclusion and Next Steps
Introduction to SSH and Raspberry Pi
SSH, or Secure Shell, is a cryptographic network protocol that allows users to securely access remote computers over an unsecured network. When it comes to the Raspberry Pi, SSH enables you to control your device remotely, making it ideal for headless setups where no monitor or keyboard is attached.
Why SSH is Essential for Raspberry Pi Users
Using SSH to Raspberry Pi remotely offers several advantages:
- Access your Raspberry Pi from anywhere in the world.
- Perform administrative tasks without needing physical access.
- Automate scripts and tasks remotely.
- Enhance security by encrypting data transmissions.
Benefits of Using SSH
SSH provides more than just remote access; it ensures secure communication between devices. By leveraging encryption protocols, SSH protects sensitive data from unauthorized access. Below are some key benefits of using SSH to Raspberry Pi remotely:
Enhanced Security
SSH uses strong encryption algorithms to secure data in transit, making it difficult for attackers to intercept or tamper with your connection.
Efficient Resource Management
With SSH, you can manage multiple Raspberry Pi devices simultaneously, streamlining your workflow and saving time.
Cost-Effective Solution
Since SSH eliminates the need for additional hardware like monitors or keyboards, it reduces costs associated with setting up and maintaining your Raspberry Pi.
Read also:5movierulzcom Kannada Movie 2024 Your Ultimate Guide To The Latest Film Releases
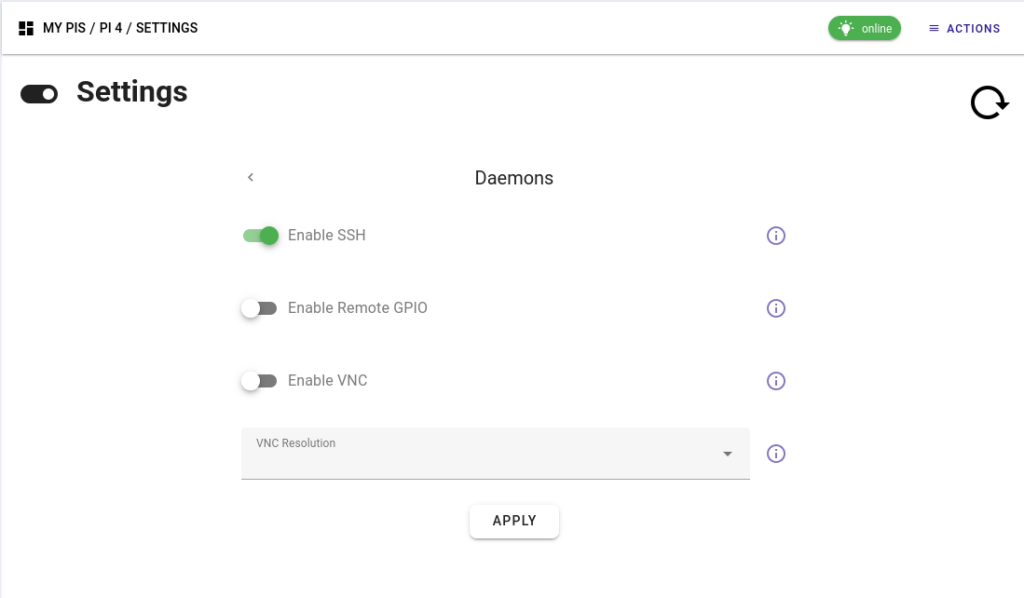
Setting Up SSH on Raspberry Pi
Before you can SSH to Raspberry Pi remotely, you need to enable SSH on your device. Follow these steps to get started:
Enabling SSH on Raspberry Pi OS
- Power on your Raspberry Pi and log in to the desktop environment.
- Open the Raspberry Pi Configuration tool by navigating to Preferences > Raspberry Pi Configuration.
- Go to the Interfaces tab and select Enable next to SSH.
- Reboot your Raspberry Pi to apply the changes.
Alternative Method: Using the Command Line
If you're using a headless setup, you can enable SSH via the terminal:
- Open the terminal and type
sudo raspi-config. - Select Interfacing Options > SSH and enable it.
- Reboot your Raspberry Pi to activate SSH.
Connecting to Raspberry Pi Remotely
Once SSH is enabled on your Raspberry Pi, you can connect to it from another computer. Here's how:
Step 1: Determine Your Raspberry Pi's IP Address
To connect to your Raspberry Pi remotely, you need its IP address. You can find it by typing the following command in the terminal:
ifconfig or ip addr.
Step 2: Use an SSH Client
On Windows, macOS, or Linux, you can use an SSH client like PuTTY or the built-in terminal to establish a connection. For example, in the terminal, type:
ssh pi@YOUR_RASPBERRY_PI_IP.
Step 3: Enter Your Password
When prompted, enter the default password for the Raspberry Pi user, which is usually "raspberry". You can change this password later for added security.
Securing Your SSH Connection
While SSH is inherently secure, there are additional steps you can take to further protect your Raspberry Pi:
Change the Default Password
Using the default password "raspberry" can make your device vulnerable to attacks. Change it immediately by typing:
sudo passwd.
Disable Root Login
Disallowing root login reduces the risk of unauthorized access. Edit the SSH configuration file:
sudo nano /etc/ssh/sshd_config.
Set PermitRootLogin no and restart SSH:
sudo systemctl restart ssh.
Use Public Key Authentication
Instead of relying on passwords, you can use public key authentication for added security. Generate a key pair on your client machine:
ssh-keygen.
Copy the public key to your Raspberry Pi:
ssh-copy-id pi@YOUR_RASPBERRY_PI_IP.
Tools and Software for SSH
Several tools and software can enhance your SSH experience. Below are some popular options:
PuTTY
PuTTY is a free and open-source SSH client for Windows that offers a user-friendly interface.
WinSCP
WinSCP is another excellent tool for managing files over SSH. It provides a graphical interface for transferring files between your computer and Raspberry Pi.
Termius
For mobile users, Termius is a versatile SSH client available on iOS and Android. It allows you to connect to your Raspberry Pi from your smartphone or tablet.
Troubleshooting Common Issues
Even with proper setup, you might encounter issues when trying to SSH to Raspberry Pi remotely. Here are some common problems and their solutions:
Connection Refused
Ensure that SSH is enabled on your Raspberry Pi and that the IP address is correct. Check your firewall settings to confirm that port 22 (default SSH port) is open.
Authentication Failed
Double-check your username and password. If you're using public key authentication, verify that the public key is correctly added to the authorized_keys file on your Raspberry Pi.
Timeout Errors
If you're experiencing timeouts, ensure that your network connection is stable. Additionally, check for any routing issues or NAT configurations that might block the connection.
Advanced SSH Techniques
Once you're comfortable with basic SSH operations, you can explore advanced techniques to further enhance your experience:
Port Forwarding
Port forwarding allows you to map external ports to internal services, enabling access to your Raspberry Pi from outside your local network.
Tunneling
SSH tunneling can be used to securely access services running on your Raspberry Pi, such as web servers or databases.
Automating Tasks
By combining SSH with scripts, you can automate routine tasks like backups, updates, and monitoring.
Frequently Asked Questions
Q: Can I SSH to Raspberry Pi from anywhere?
A: Yes, as long as your Raspberry Pi is connected to the internet and properly configured, you can SSH to it from anywhere in the world.
Q: Is SSH safe to use?
A: SSH is a secure protocol that encrypts all data transmitted between devices. However, following best practices like changing default passwords and disabling root login can further enhance security.
Q: Do I need a static IP address?
A: While a static IP address simplifies remote access, it's not mandatory. You can use dynamic DNS services to map your dynamic IP to a fixed domain name.
Conclusion and Next Steps
In this comprehensive guide, we've explored how to SSH to Raspberry Pi remotely, covering everything from setup to advanced techniques. By following the steps outlined, you can securely access and manage your Raspberry Pi from anywhere in the world.
Remember to prioritize security by changing default passwords, disabling root login, and using public key authentication. Additionally, consider exploring advanced SSH features like port forwarding and tunneling to further enhance your capabilities.
We invite you to share this article with others who might find it useful. For more tips and tutorials, explore our other articles on Raspberry Pi and related technologies. Happy tinkering!


